Make LCD Monitor In Photoshop

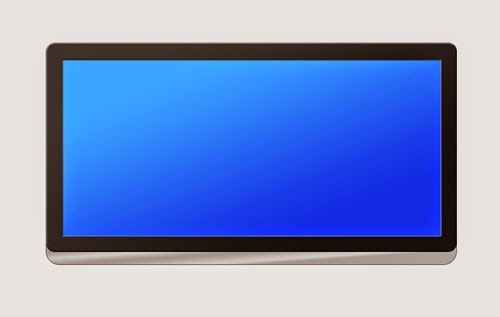
In this tutorial I will show step by step how to make an LCD monitor in Photoshop. Very easy to do just by using layer style effects in Photoshop we get a cool LCD design. Let's get started!
Step 1
Open the Photoshop program create a new document sized 800px width 700px height. Select the menu View -> New Guide Position: 100px 700px 350px 450px.

Step 2
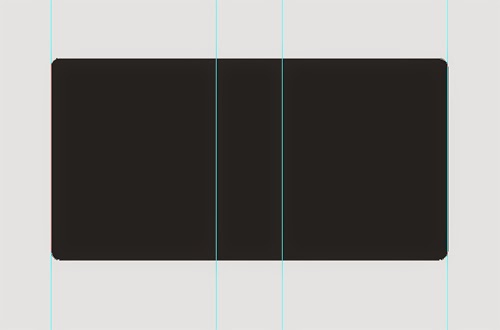
Change the Set Foreground Color gray color # 232323 activate the Rounded Rectangle Tool and set the radius value of 13px. Create a monitor box as shown below.
Step 3
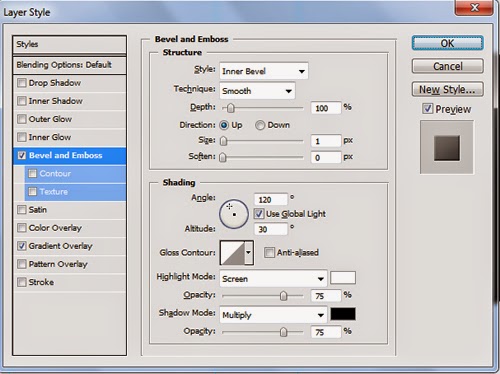
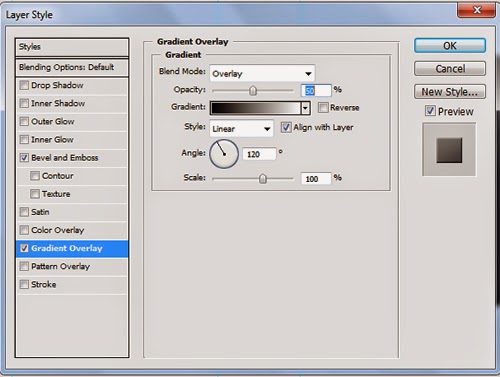
Add a layer style: Bevel and Emboss, Gradient Overlay. Set as shown below.
Step 4
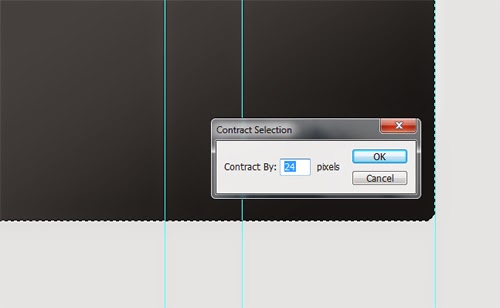
Create a selection in the monitor box (Shape 1) then select the menu Select -> Modify -> Contract 24px
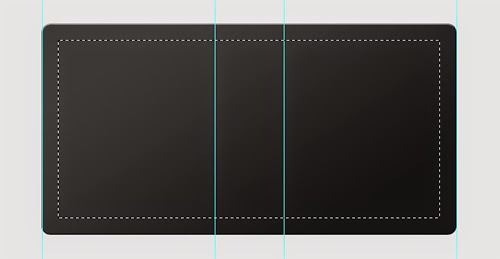
Step 5
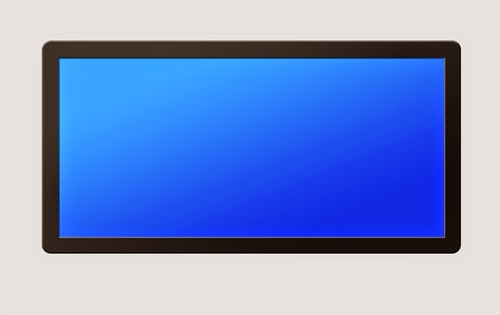
Create a new layer Set Foreground Color to change color in blue # 226ae0 and blue color fill layer 1 (alt + del).
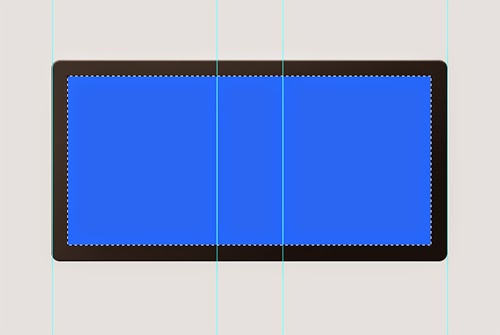
Step 6
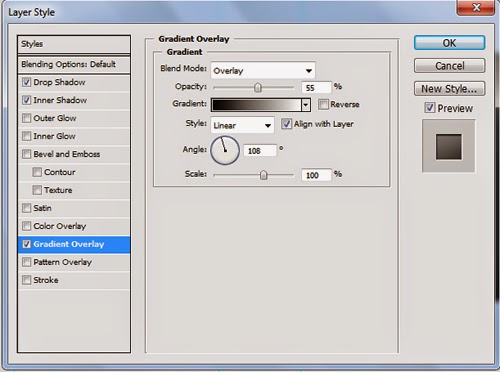
Add layer styles: Drop Shadow, Inner Shadow, Gradient Overlay. Set as shown below.
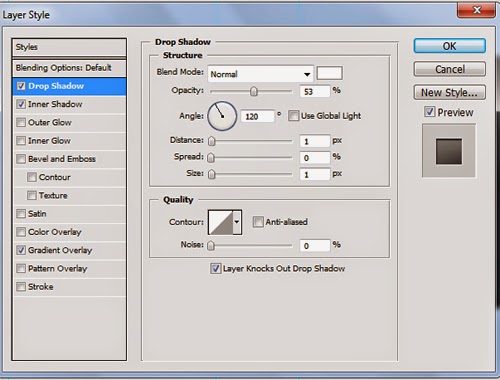
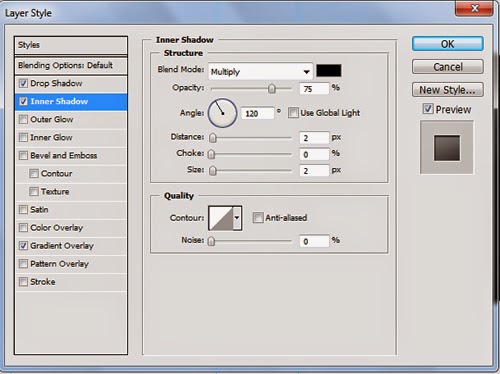
Step 7
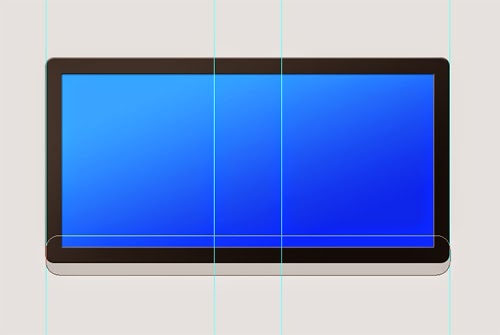
Activate the menu Rounded Rectangle Tool with a radius of 20px, before change Foreground Color Set #CCCCCC silver color.
Step 8
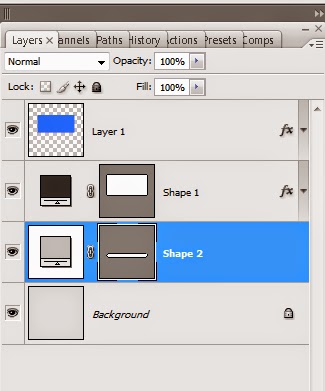
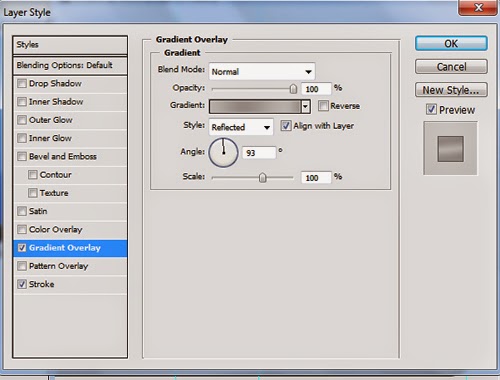
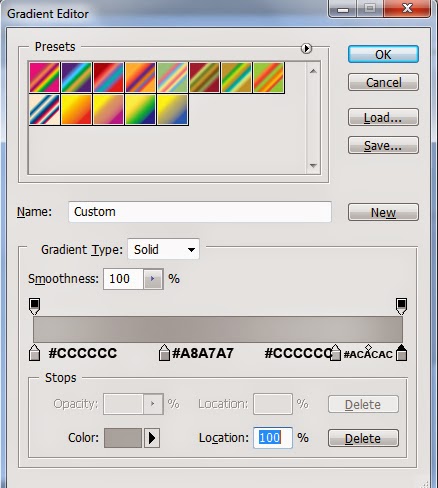
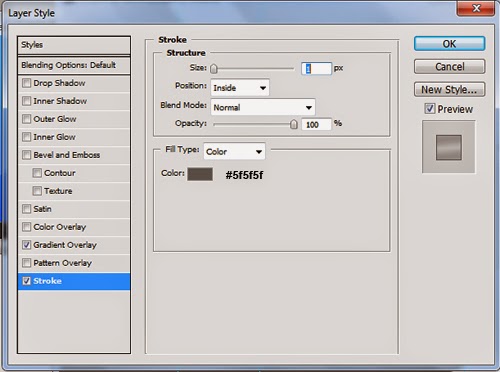
Add layer styles: Gradient Overlay, Stroke set as shown below.
Step 9
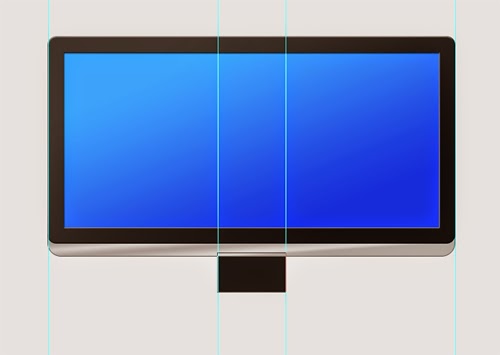
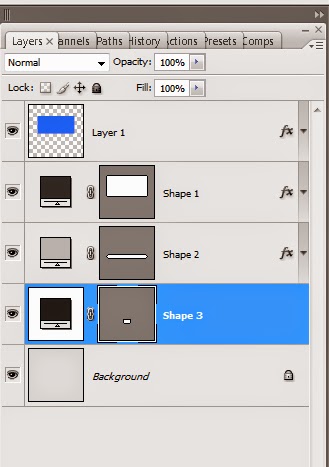
Use the Rectangle Tool to create a box under the Shape 2 layer before you change Foregorund Set Color with color # 171717.
Step 10
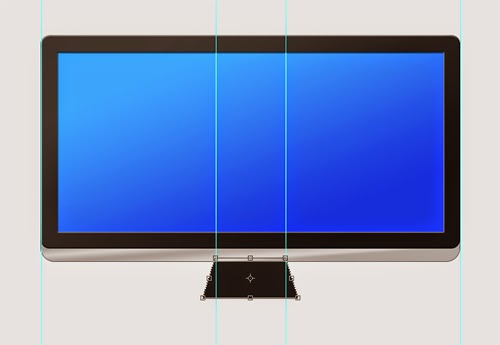
Then select the menu Edit -> Transform Path-> Perspective change at the bottom of the widened.
Step 11
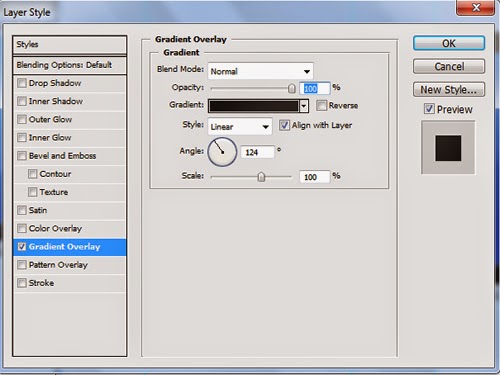
Add Layer styles: Gradient Overlay
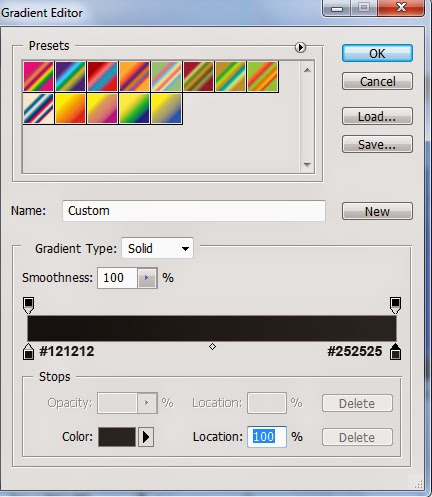
Step 12
Activate the Ellipse Tool to create a monitor base
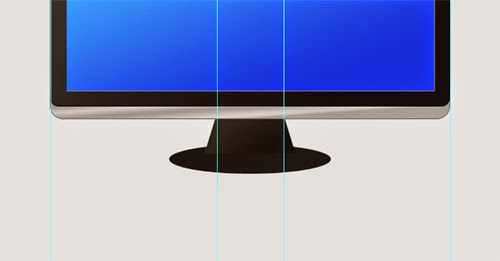
Step 13
Duplicate ten times you can press (ctrl + alt + up arrow).
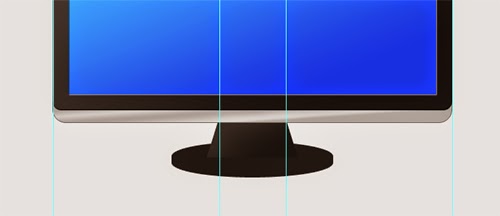
Step 14
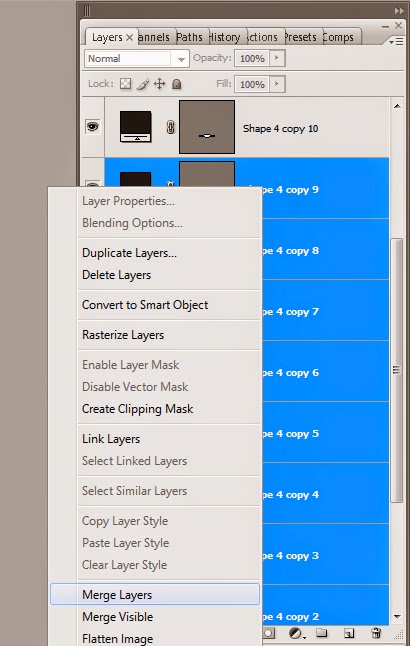
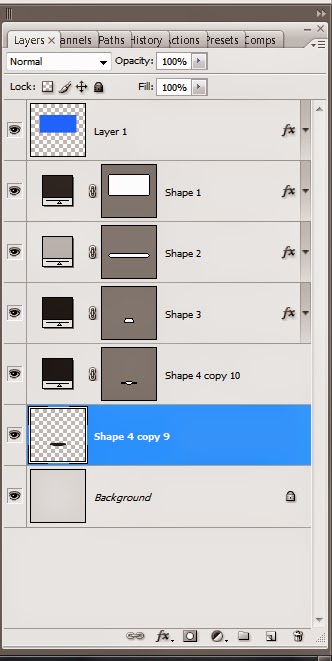
Layer Selection: Shape 4 to Shape 4 copy 9 do not forget to press the shift key on the keyboard. Right-click and select the menu Marge Layers (ctrl + e)
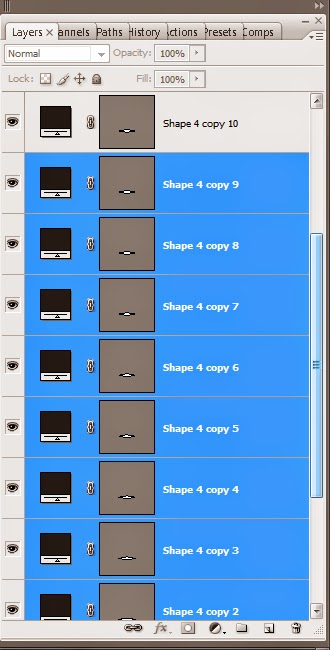
Step 15
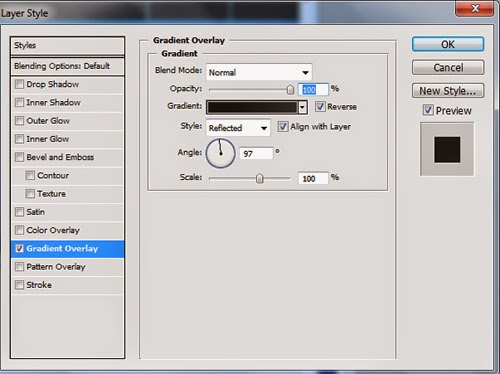
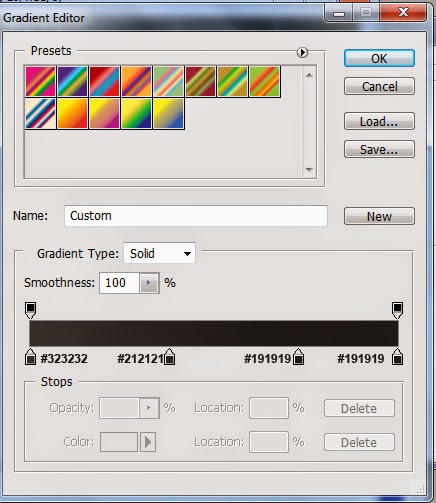
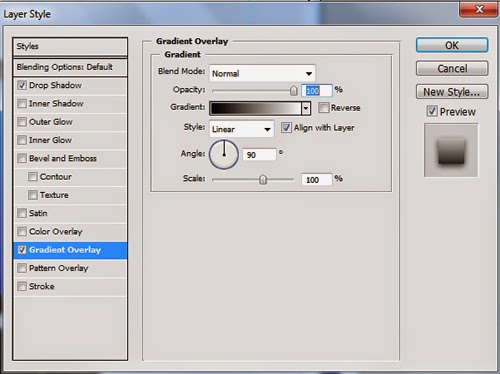
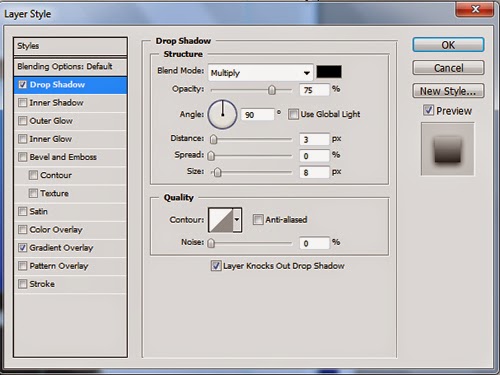
Activate Shape 4 copy 10 Layer and add layer styles: Gradient Overlay
Step 16
Activate t Shape 4 copy 9 Layer and add layer styles: Gradient Overlay, Drop Shadow
Step 17
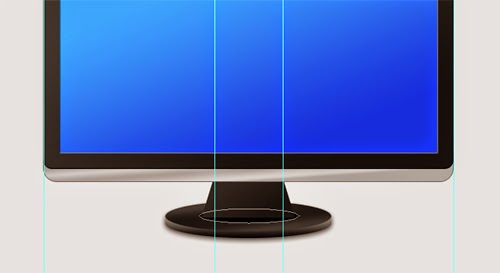
Now we will create a shadow effect on the shape 3 layer. Activate the Ellipse Tool create a circle of black color like in the picture below
Step 18
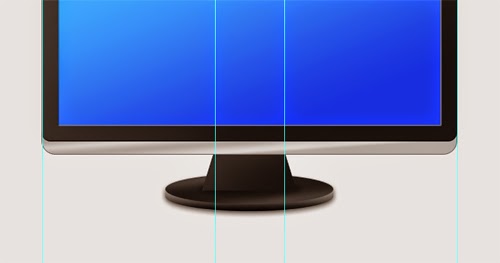
Select Filter -> Blur -> Gaussian Blur Radius: 3.3px and set Opacity: 40%
Step 19
Selection Shape 1 layer and use the Polygonal Lasso Tool create a selection like the image below.
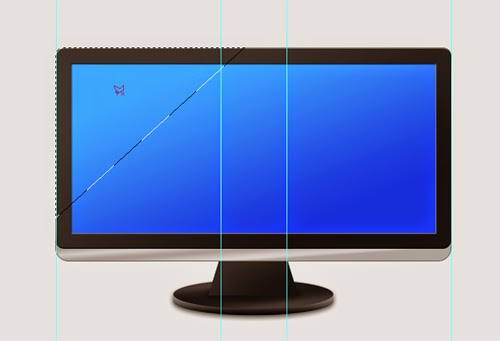
Step 20
Create a new layer fill with white and change the opacity: 19%


Comments
Post a Comment