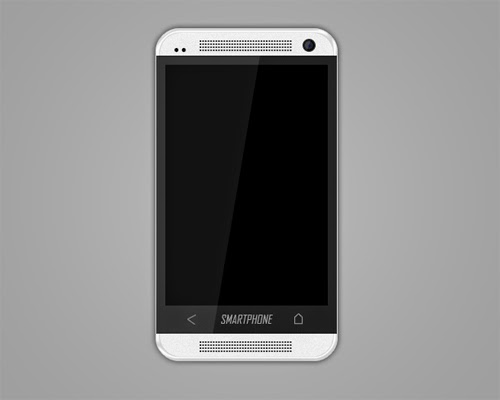
How To Create a Silver Smartphone In Photoshop

Step 1
Create a new document width : 700px height : 800px #b8b8b8 background color. Use the Rounded Rectangle Tool set the Radius 27px #ededed color and start drawing a smartphone.
.jpg)
Step 2
The next step is right click on the shape layer1 and select Rasterize Layer. Select the menu Filter - Noise - Add Noise set Amount 2%.
.jpg)
.jpg)
Step 3
Selection layes shape1 with ctrl + click Shape1. Select the menu Select - Modify- Expand Expand the input value by 5px
.jpg)
.jpg)
.jpg)
.jpg)
Step 4
Create a new layer and fill the selection with color code #ededed. You can press alt + delete on the keyboard.
.jpg)
Step 5
Now you slide layer1 down Shape1
.jpg)
Step 6
Remove the selection with the select menu Select - Deselect or press ctrl + D on the keyboard. Add a layer style: Bevel and Emboss and Stroke
.jpg)
.jpg)
Step 7
Selection layer1 and activate the Rectangular Marquee Tool also do not forget to activate the Intersect With Selection. Start making boxes in the Layer1.
.jpg)
.jpg)
Step 8
Create a new layer and change the layer2 position on the shape1
.jpg)
Step 9
Set Foreground Color to change color with the color code # 020 202 and press ctrl + delete on the keyboard for coloring Layer2. Change the Blend mode to Multiply layer2
.jpg)
Step 10
Selection layer2 and choose Select - Modify - Contract 12px input value. Change color Foregorund Set Color black and press alt + delete on the keyboard
.jpg)
.jpg)
.jpg)
Step 11
Select the Edit menu - Transform - Scale, downsizing the layer2 like on this picture
.jpg)
Step 12
You can make the menu back and home with the Pen Tool or Brush Tool
.jpg)
Step 13
Create two small black circles using the Ellipse Tool. Activate the Brush Tool image small black box with a Master Diamete 2px to draw a speaker. You make like on this picture
.jpg)
Step 14
Do not forget to duplicate earlier speakers and put down
.jpg)
Step 15
The next step is to make the lens of the camera, before you change the color of Set the Foreground Color to color code # 1e1e1e. Use the Ellipse Tool to create a circle. Alt + click to select the circle lenses and choose Select - Modify - Contract and enter 2px numbers.
.jpg)
Step 16
Create a new layer and fill it with a color code # 1e1e1e. Ctrl + D to remove the selection and add a layer style stroke
.jpg)
.jpg)
Step 17
Create a small circle in the center of the lens with a dark blue # 020c73. Now you combine into one circle lens before you do the second selection menu layer and click Layer - Merge Leyers or ctrl + E. Change the Set Foreground Color to white. Use the Polygonal Lasso Tool to create selection as on this picture.
.jpg)
.jpg)
.jpg)
Step 18
Change the opacity to 11%
.jpg)
Step 19
Use the Pen Tool to draw a field of white color and set the opacity to 7%
.jpg)
Step 20
And this is the final result .. well done


Comments
Post a Comment